Subscriber Exclusive
Must-Know Mend: Creative Swiss Darning
If you are a knitter, this mending technique is the key to caring for handknits, and we have few tips to make it more secure and creative. Plus, we’re kicking off a month-long mend-along!
If you are a knitter, this mending technique is the key to caring for handknits, and we have few tips to make it more secure and creative. Plus, we’re kicking off a month-long mend-along! <a href="https://farmfiberknits.com/must-know-mend-creative-swiss-darning/">Continue reading.</a>
https://farmfiberknits.com/cdn-cgi/image/format=auto/https://www.datocms-assets.com/101500/1767827591-sock-mending.jpg?auto=format&w=900
Swiss darning, or duplicate stitch, is a method of working new knitted stitches over the surface of a knitted fabric, duplicating the thread path below. It’s easy to learn and only requires a little yarn and a tapestry needle! Swiss darning can be used to create invisible mends that cover thinning fabric or add colorful pops anywhere you like. Have you ever tried adding Fair Isle patches on plain sweaters?
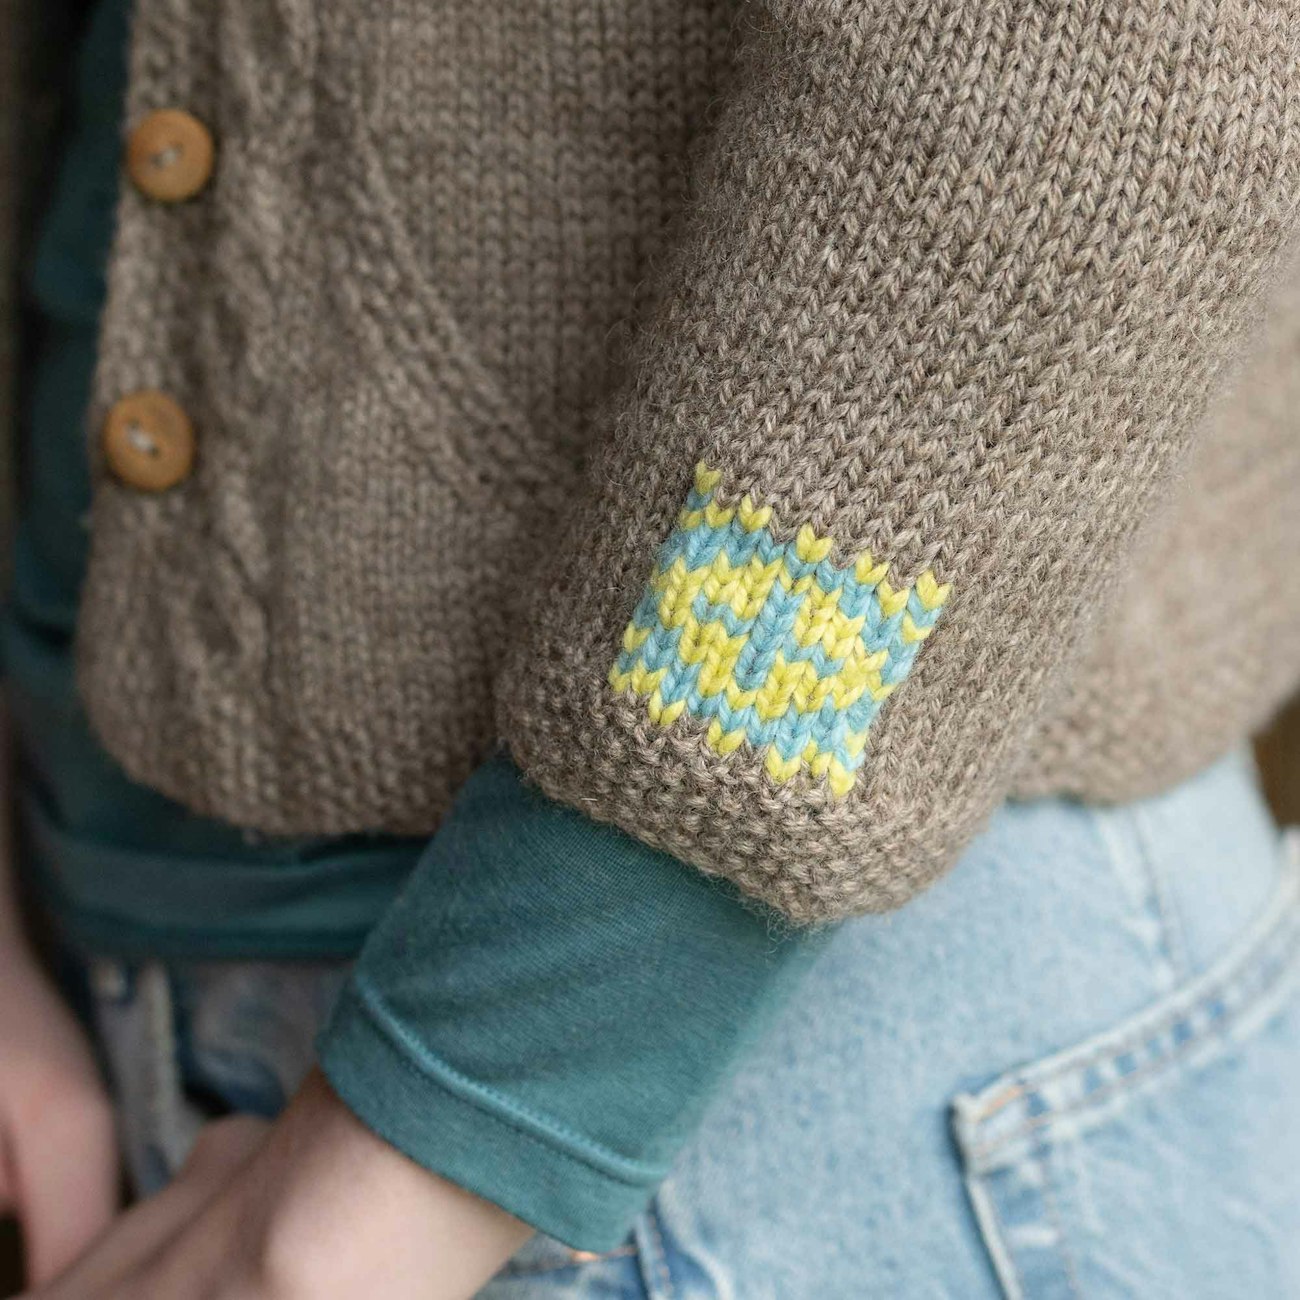
Mends don't have to be plain! This DK weight sweater was mended with Brown Sheep Company Waverly Wool Needlepoint Yarn, which is easy to divide for finer knits and comes in a wide range of colors.
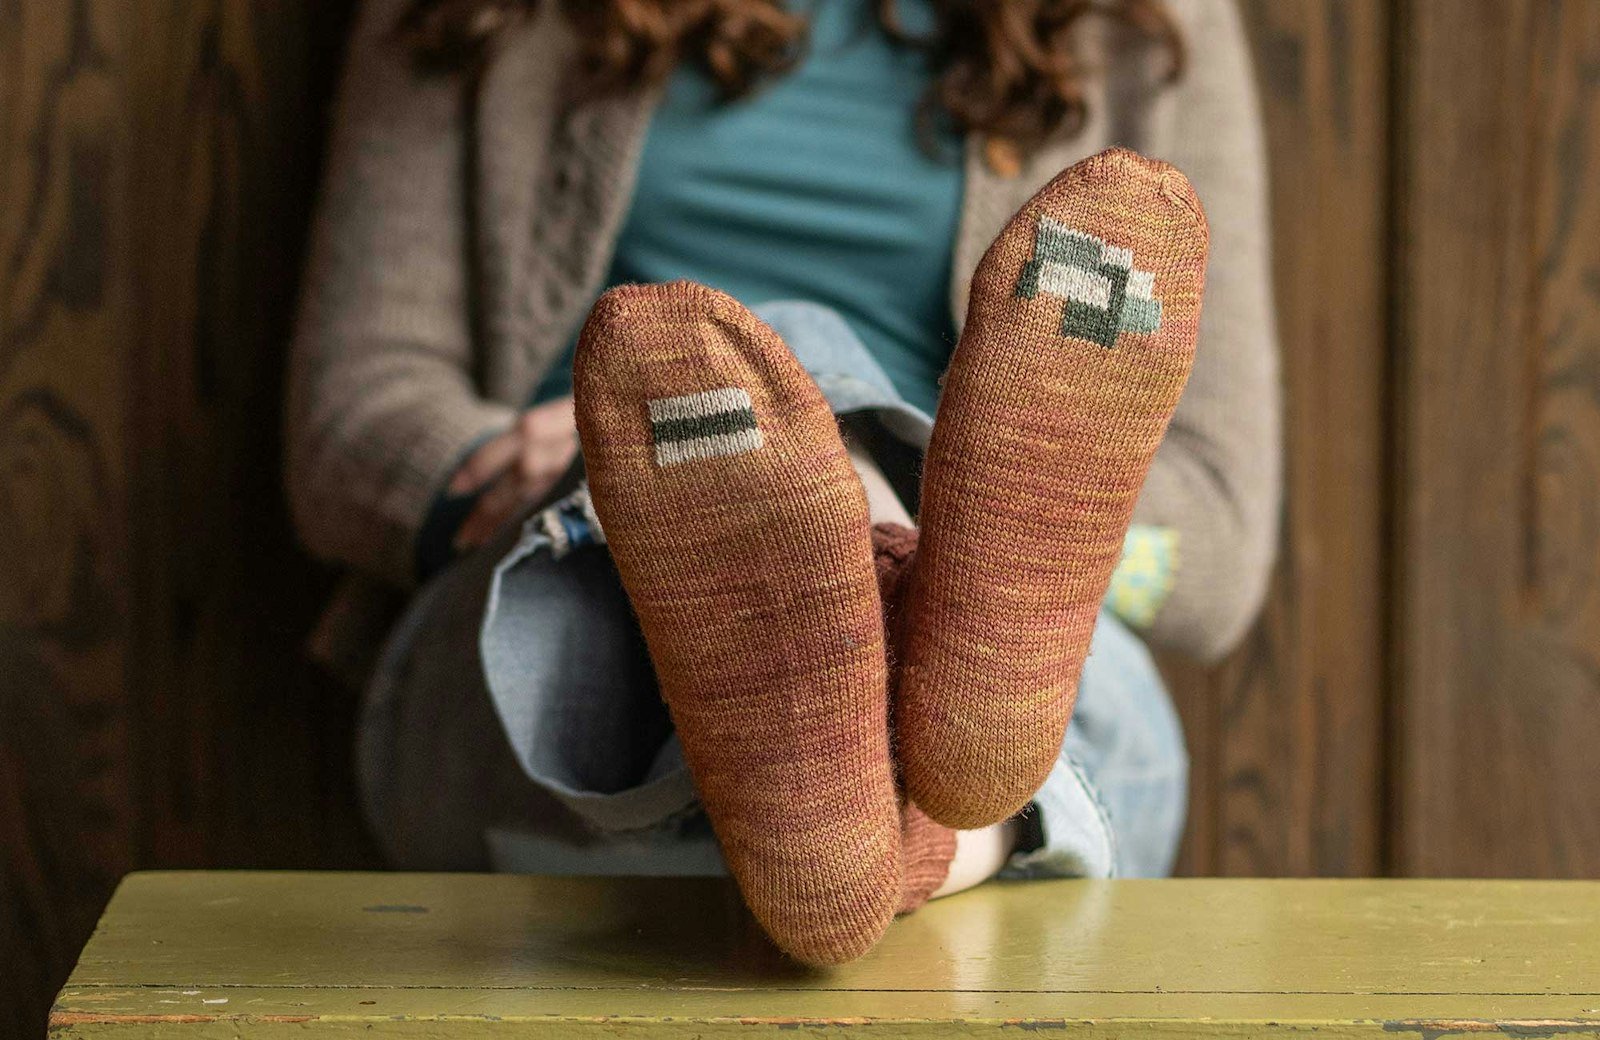
Just because Swiss darning is easy to do doesn’t mean it can’t be used to create complex and artistic additions to your handknitted treasures. I love creating colorful geometric yet organic shapes that nest together. A bit like Tetris, you can just keep building over time. This is great for reinforcing larger areas that have become threadbare, such as elbows and sock soles.

Kate used colorful leftovers from her Cymru Socks to patch an old pair of superwash Merino handknit socks. Garthenor Organic Snowdonia Sock is much stronger and great for mending.
Like any technique, there are tips and tricks that can help make it better and easier. I like to secure my darns to the surrounding fabric, which is a bit different than most tutorials show. (Check out Steps 4 and 5 below to see how it works.) This small change also made it much easier to create tidy duplicate-stitch darns—game changer.
Mend-Along with Us!
I love watching other people mend, and I think it can be easier for all of us to tackle our mending pile if we have company. So, we invite you to join us for a mend-along this month! Here’s what we’ll be doing:
Week 1: (This post) Swiss Darning Tutorial and Tips
Week 2: Mending Tools: Basics and Beyond
Week 3: Woven Darn Tutorial
Week 4: Live Session with Kate Larson! Diagnose Your Damage and Make a Mending Plan
Week 5: Mending Inspiration! Freehand Mending Techniques and Tips
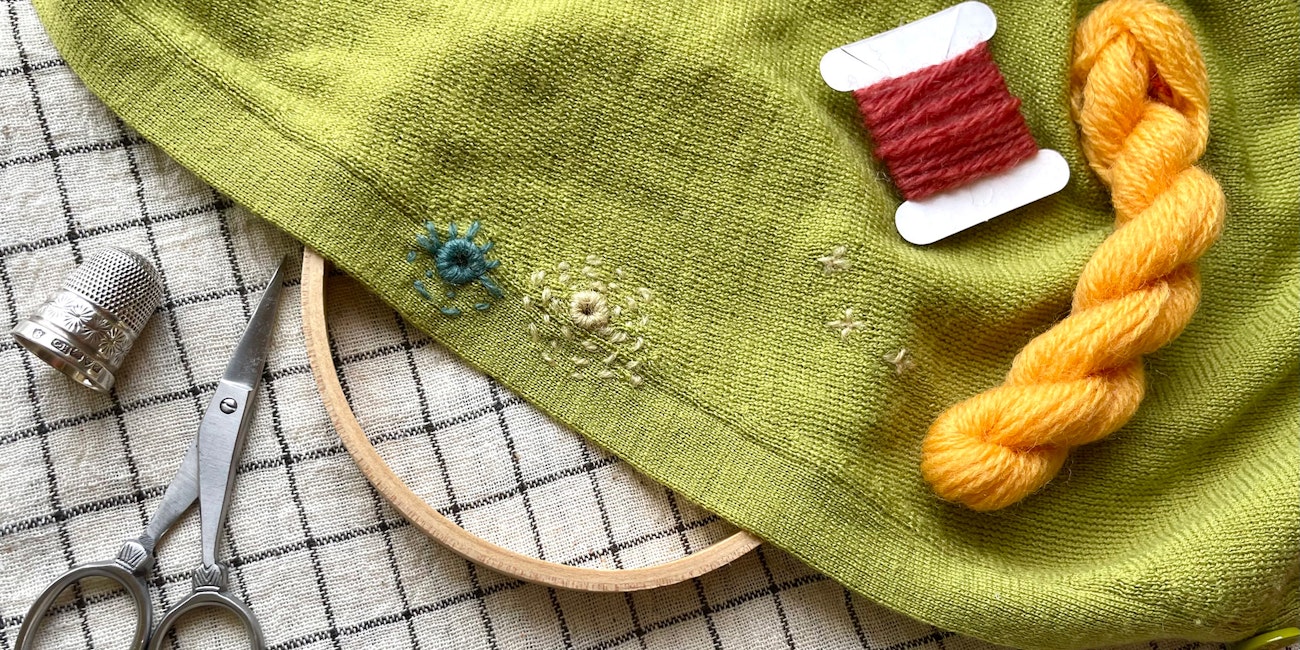
Go off the grid with embroidered stitches. Learn some surprisingly easy stitches. Photo by Kate Larson
All of these techniques can be used on anything in your closet—handknits and fast-fashion alike. If you are new to mending or feeling a little rusty, start with low-stakes mending, such as a sweater you no longer wear or a pair of socks that was destined for the rubbish bin.
Now, let’s jump into Swiss darning how-to. This technique is easiest to work over fabric that has not broken into a hole. Truly, “a stitch in time saves nine,” as the saying goes. So, grab a needle, and get stitching!
— Kate
Swiss Darning—Give it a Go!
Begin by securing your knitted fabric over a darning form. Here, I’m using a darning mushroom, but many objects can be used: an orange, an empty soda can, even your phone in a pinch. Secure with a ribbon or elastic so the fabric is stable but not stretched.
SUBSCRIBER EXCLUSIVE
Swiss darning, or duplicate stitch, is a method of working new knitted stitches over the surface of a knitted fabric, duplicating the thread path below. It’s easy to learn and only requires a little yarn and a tapestry needle! Swiss darning can be used to create invisible mends that cover thinning fabric or add colorful pops anywhere you like. Have you ever tried adding Fair Isle patches on plain sweaters?
Mends don't have to be plain! This DK weight sweater was mended with Brown Sheep Company Waverly Wool Needlepoint Yarn, which is easy to divide for finer knits and comes in a wide range of colors.
Just because Swiss darning is easy to do doesn’t mean it can’t be used to create complex and artistic additions to your handknitted treasures. I love creating colorful geometric yet organic shapes that nest together. A bit like Tetris, you can just keep building over time. This is great for reinforcing larger areas that have become threadbare, such as elbows and sock soles.
Kate used colorful leftovers from her Cymru Socks to patch an old pair of superwash Merino handknit socks. Garthenor Organic Snowdonia Sock is much stronger and great for mending.
Like any technique, there are tips and tricks that can help make it better and easier. I like to secure my darns to the surrounding fabric, which is a bit different than most tutorials show. (Check out Steps 4 and 5 below to see how it works.) This small change also made it much easier to create tidy duplicate-stitch darns—game changer.
Mend-Along with Us!
I love watching other people mend, and I think it can be easier for all of us to tackle our mending pile if we have company. So, we invite you to join us for a mend-along this month! Here’s what we’ll be doing:
Week 1: (This post) Swiss Darning Tutorial and Tips
Week 2: Mending Tools: Basics and Beyond
Week 3: Woven Darn Tutorial
Week 4: Live Session with Kate Larson! Diagnose Your Damage and Make a Mending Plan
Week 5: Mending Inspiration! Freehand Mending Techniques and Tips
Go off the grid with embroidered stitches. Learn some surprisingly easy stitches. Photo by Kate Larson
All of these techniques can be used on anything in your closet—handknits and fast-fashion alike. If you are new to mending or feeling a little rusty, start with low-stakes mending, such as a sweater you no longer wear or a pair of socks that was destined for the rubbish bin.
Now, let’s jump into Swiss darning how-to. This technique is easiest to work over fabric that has not broken into a hole. Truly, “a stitch in time saves nine,” as the saying goes. So, grab a needle, and get stitching!
— Kate
Swiss Darning—Give it a Go!
Begin by securing your knitted fabric over a darning form. Here, I’m using a darning mushroom, but many objects can be used: an orange, an empty soda can, even your phone in a pinch. Secure with a ribbon or elastic so the fabric is stable but not stretched. [PAYWALL]
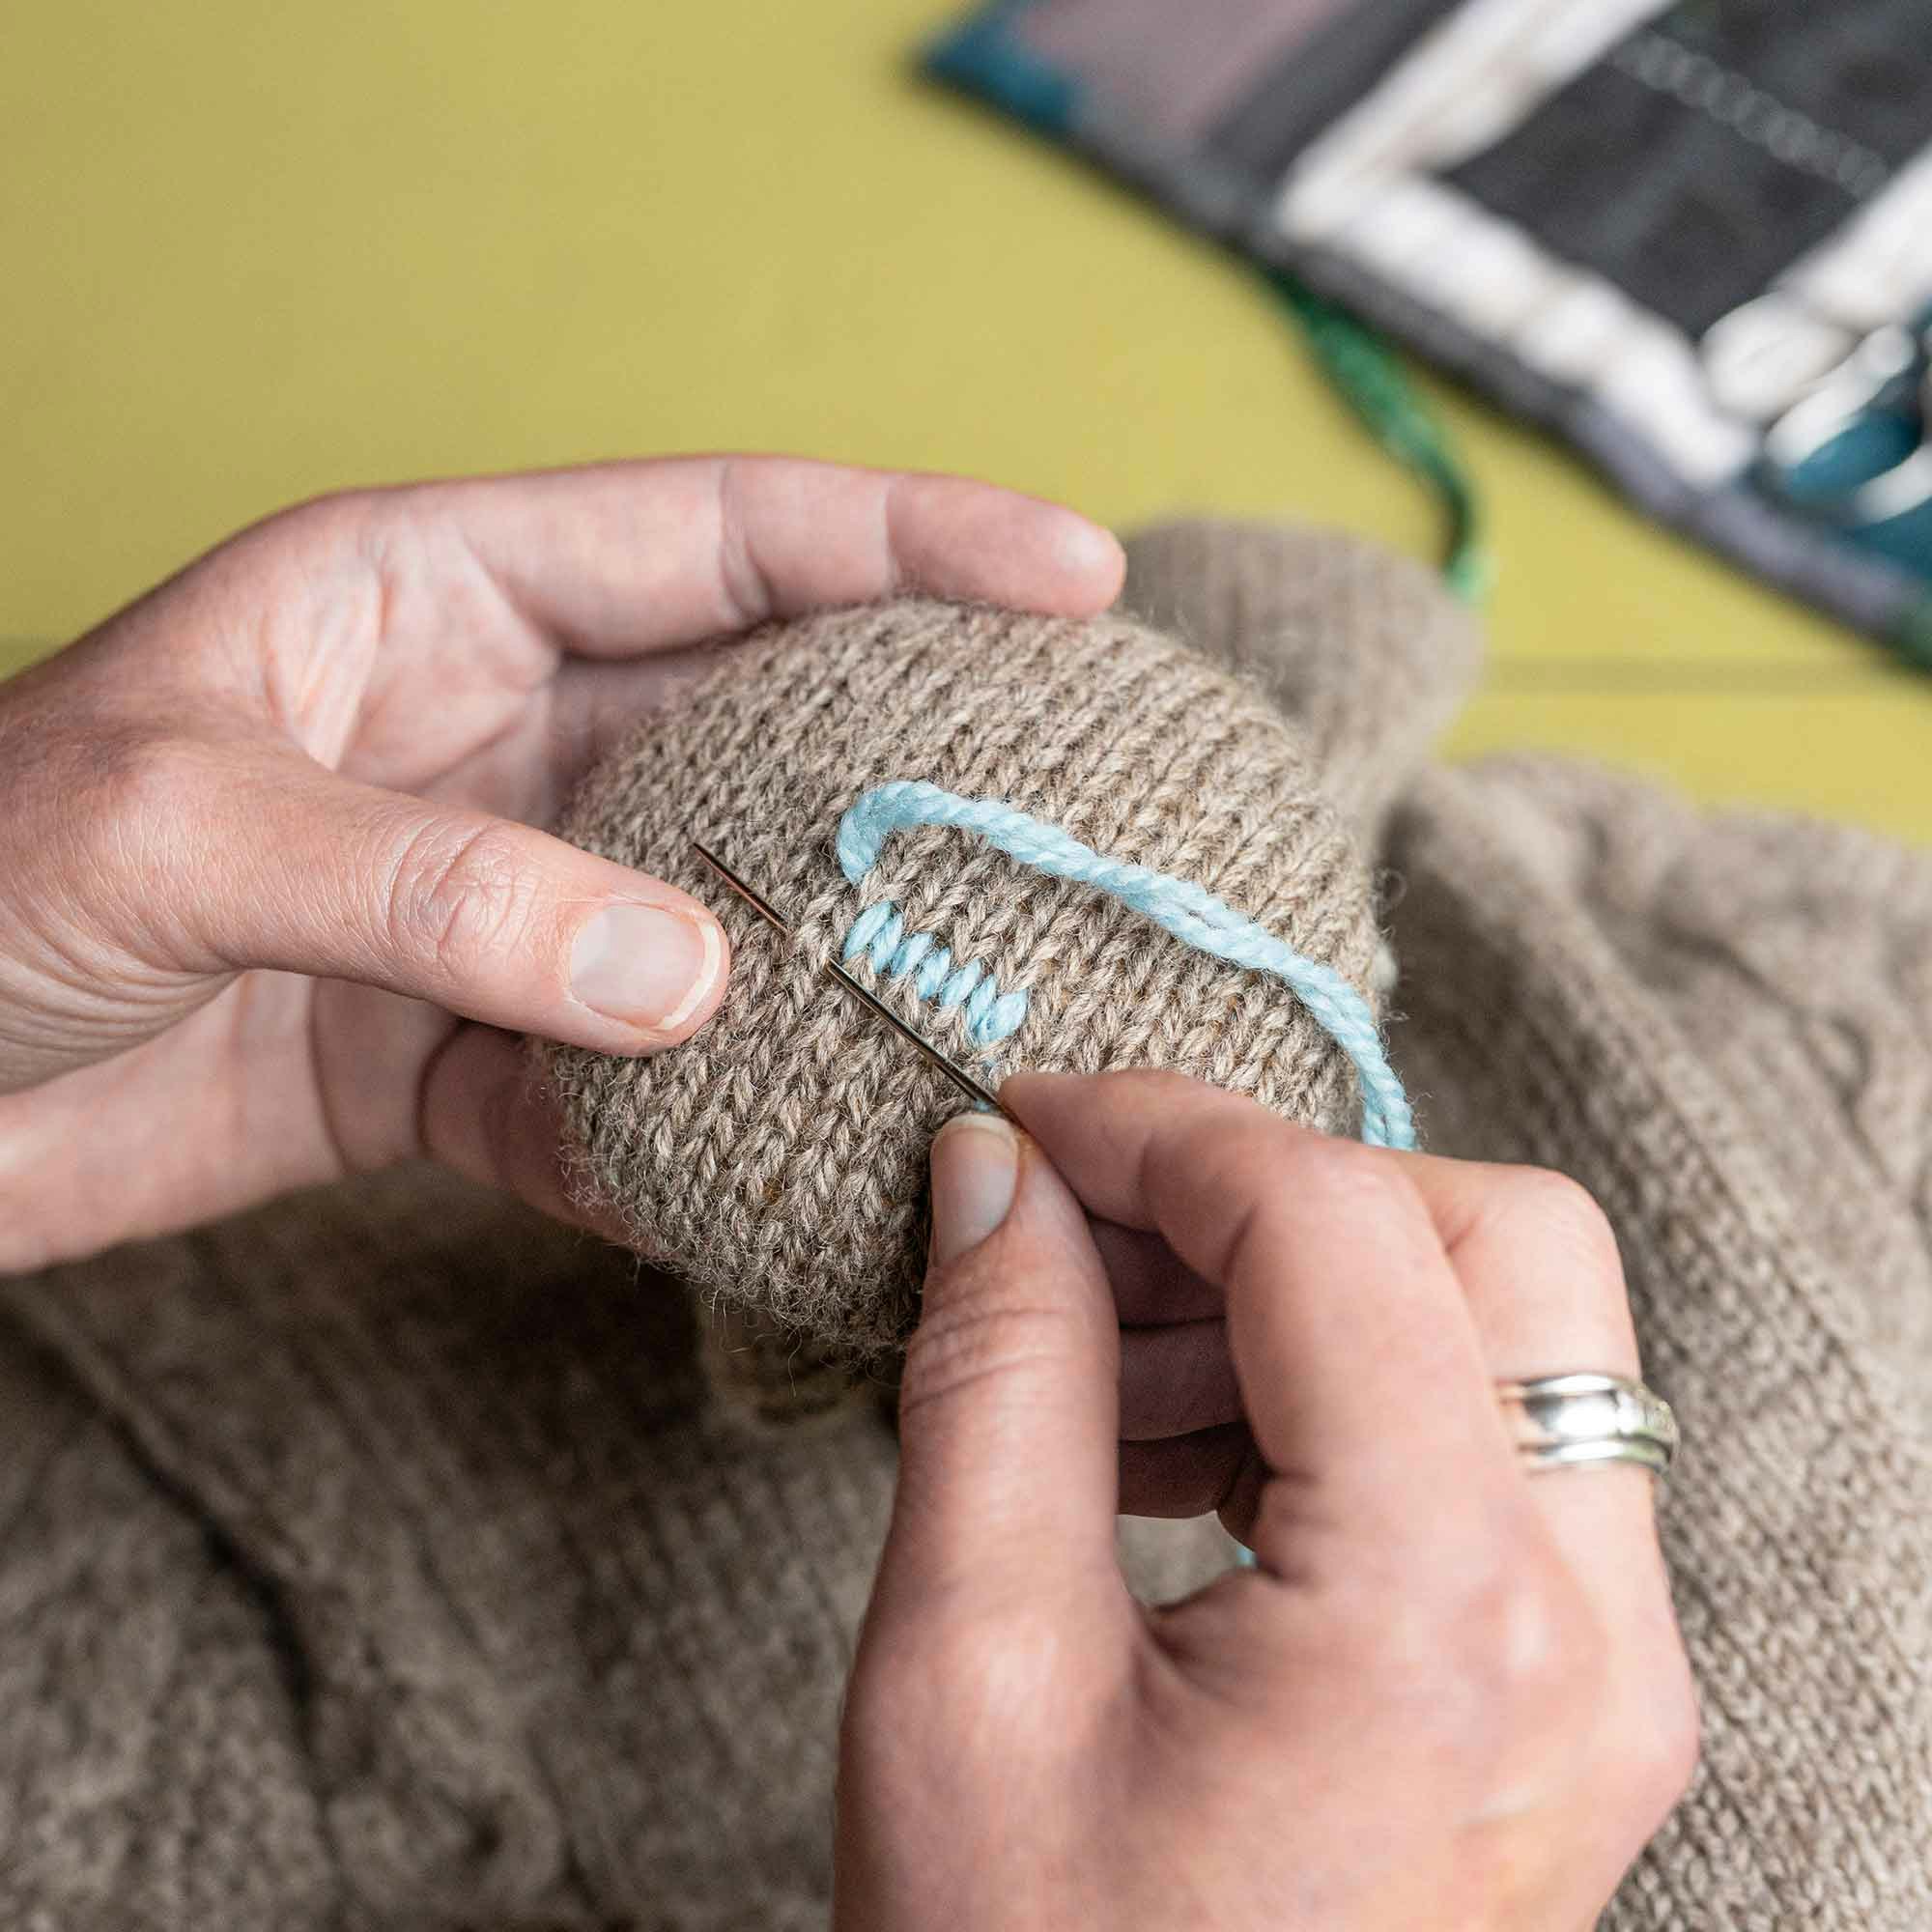
The number one tip I can give is to remember that to duplicate a stitch, the needle is inserted into the stitch below it and above it—not the stitch itself. Find even more tips at the bottom of the page.
Get a closer look! Click any image in the gallery below to open it in full-screen mode and read the step-by-step instructions.
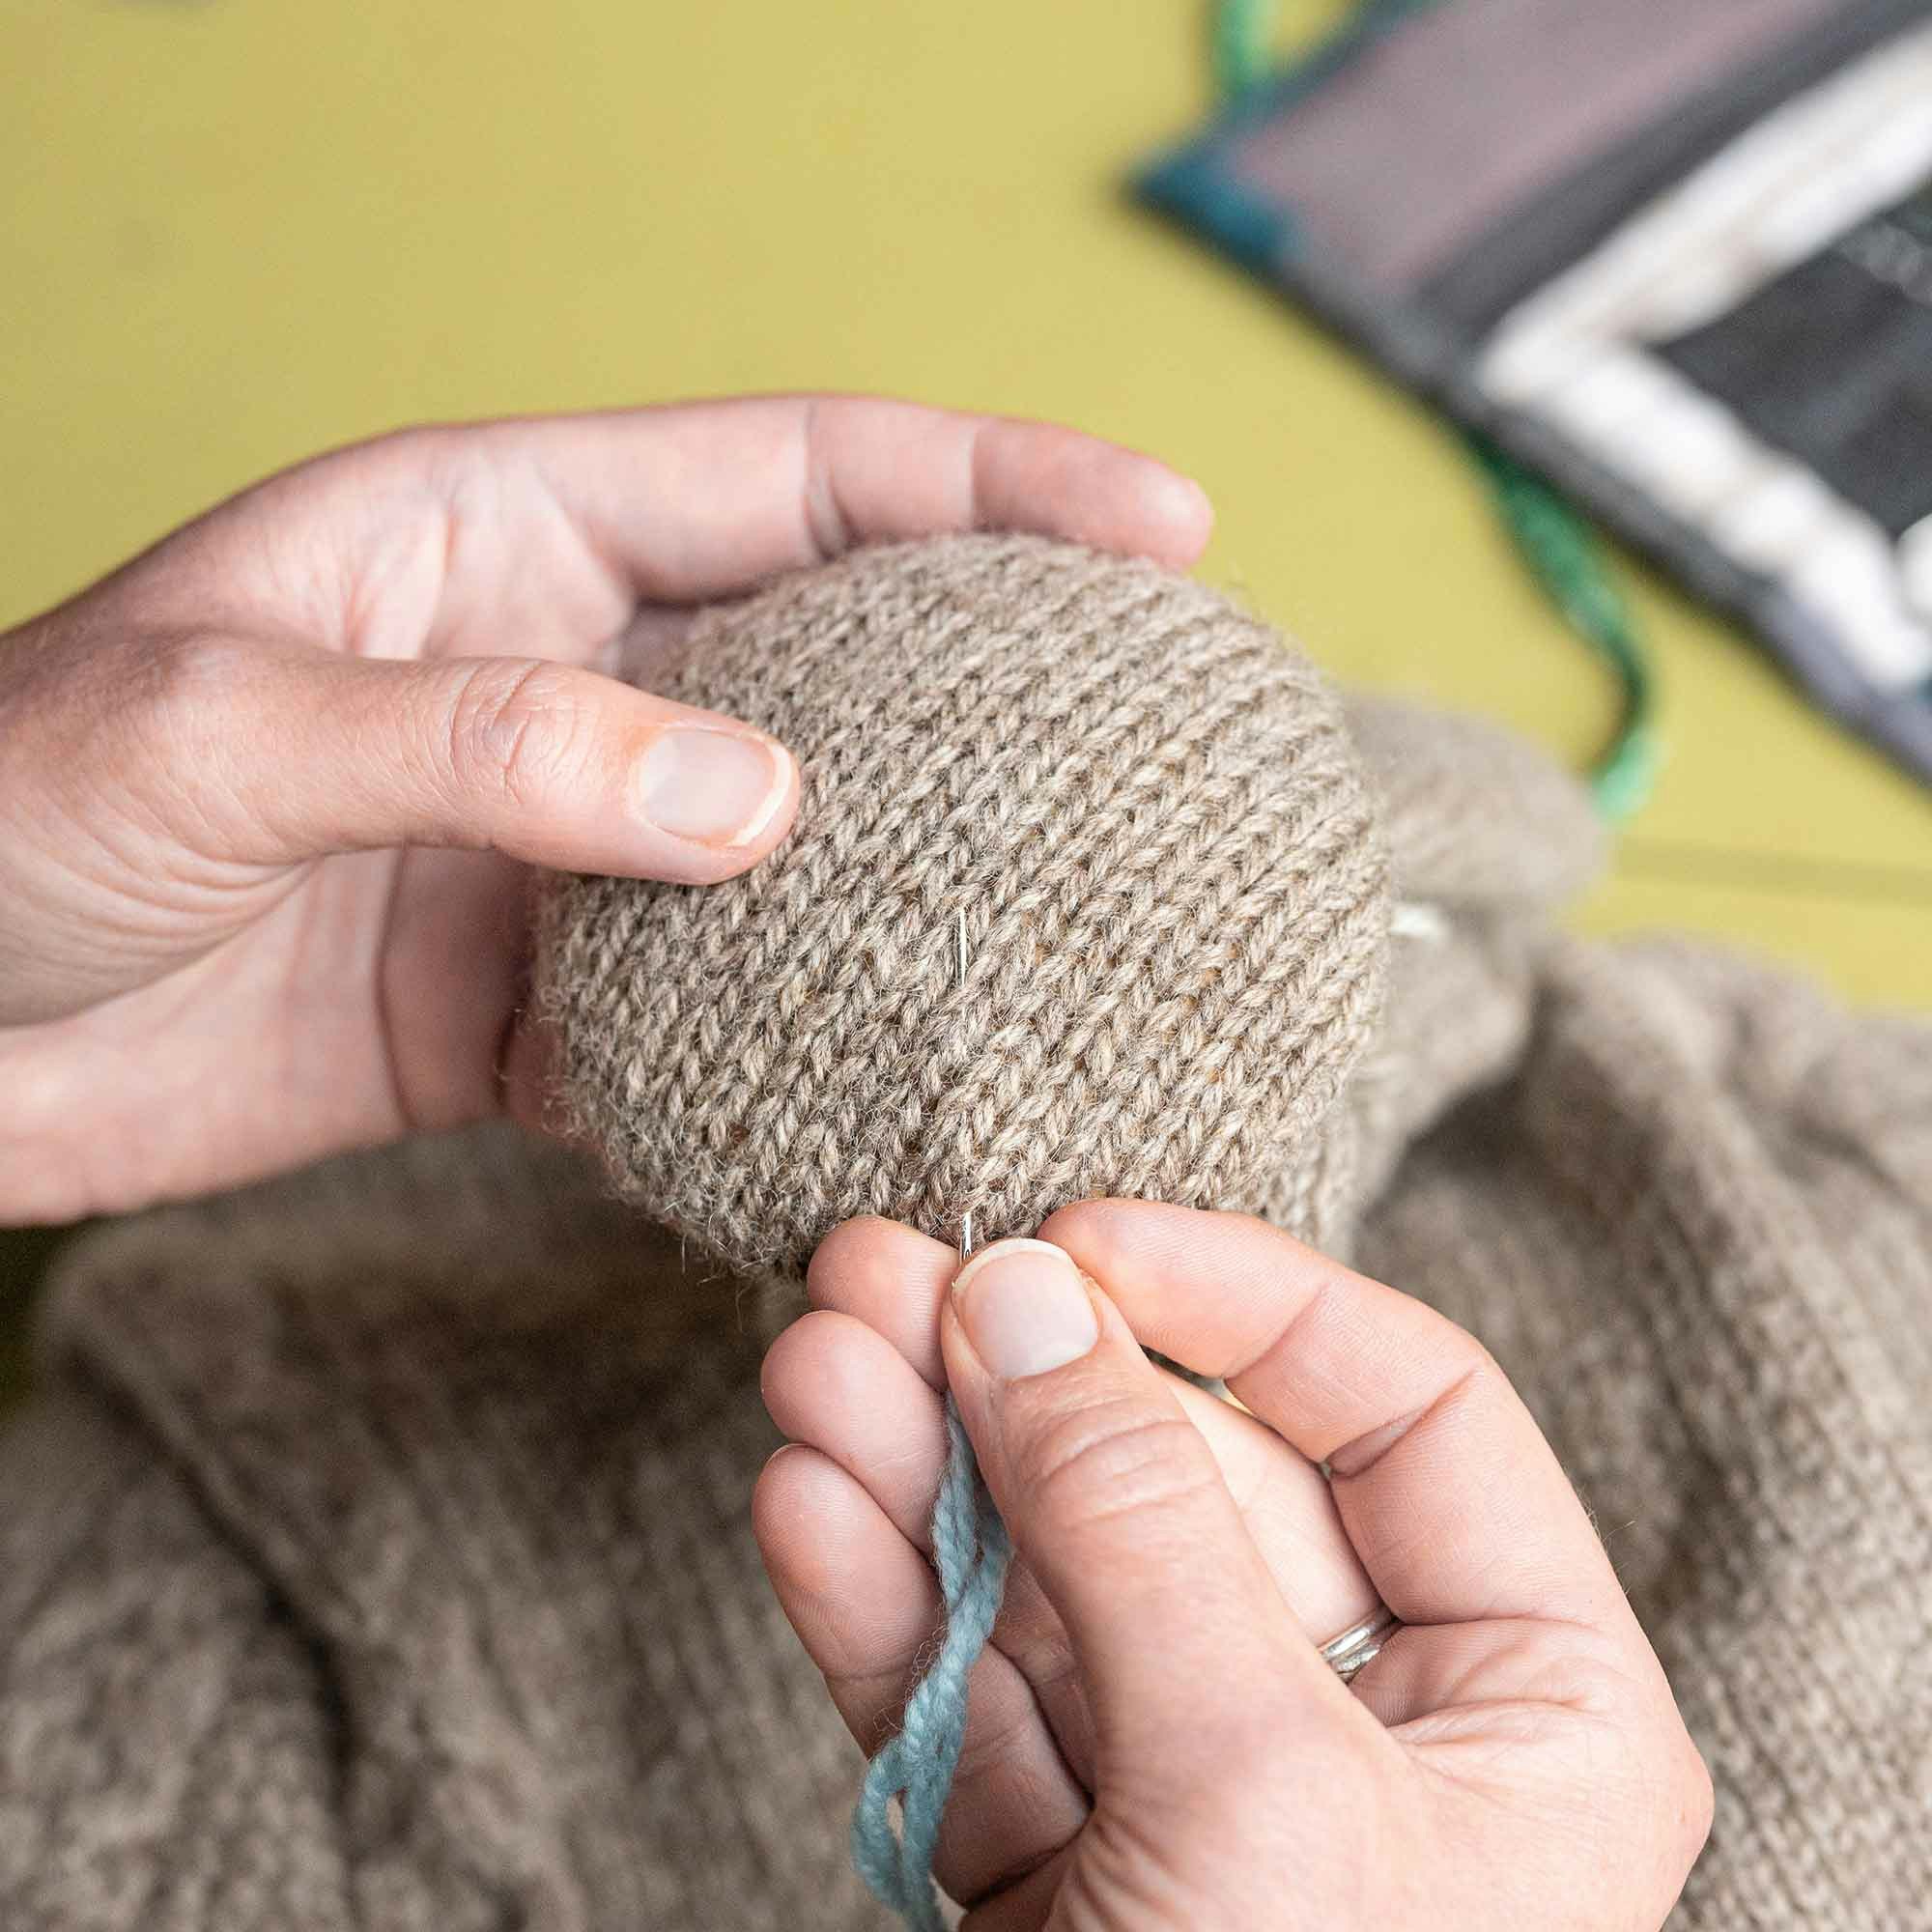
Step 1
Insert the needle a few inches from where you intend to begin your mend. Bring the needle point to the right side (RS) in the center of the stitch below the one you want to duplicate; pull the yarn through, leaving the tail.
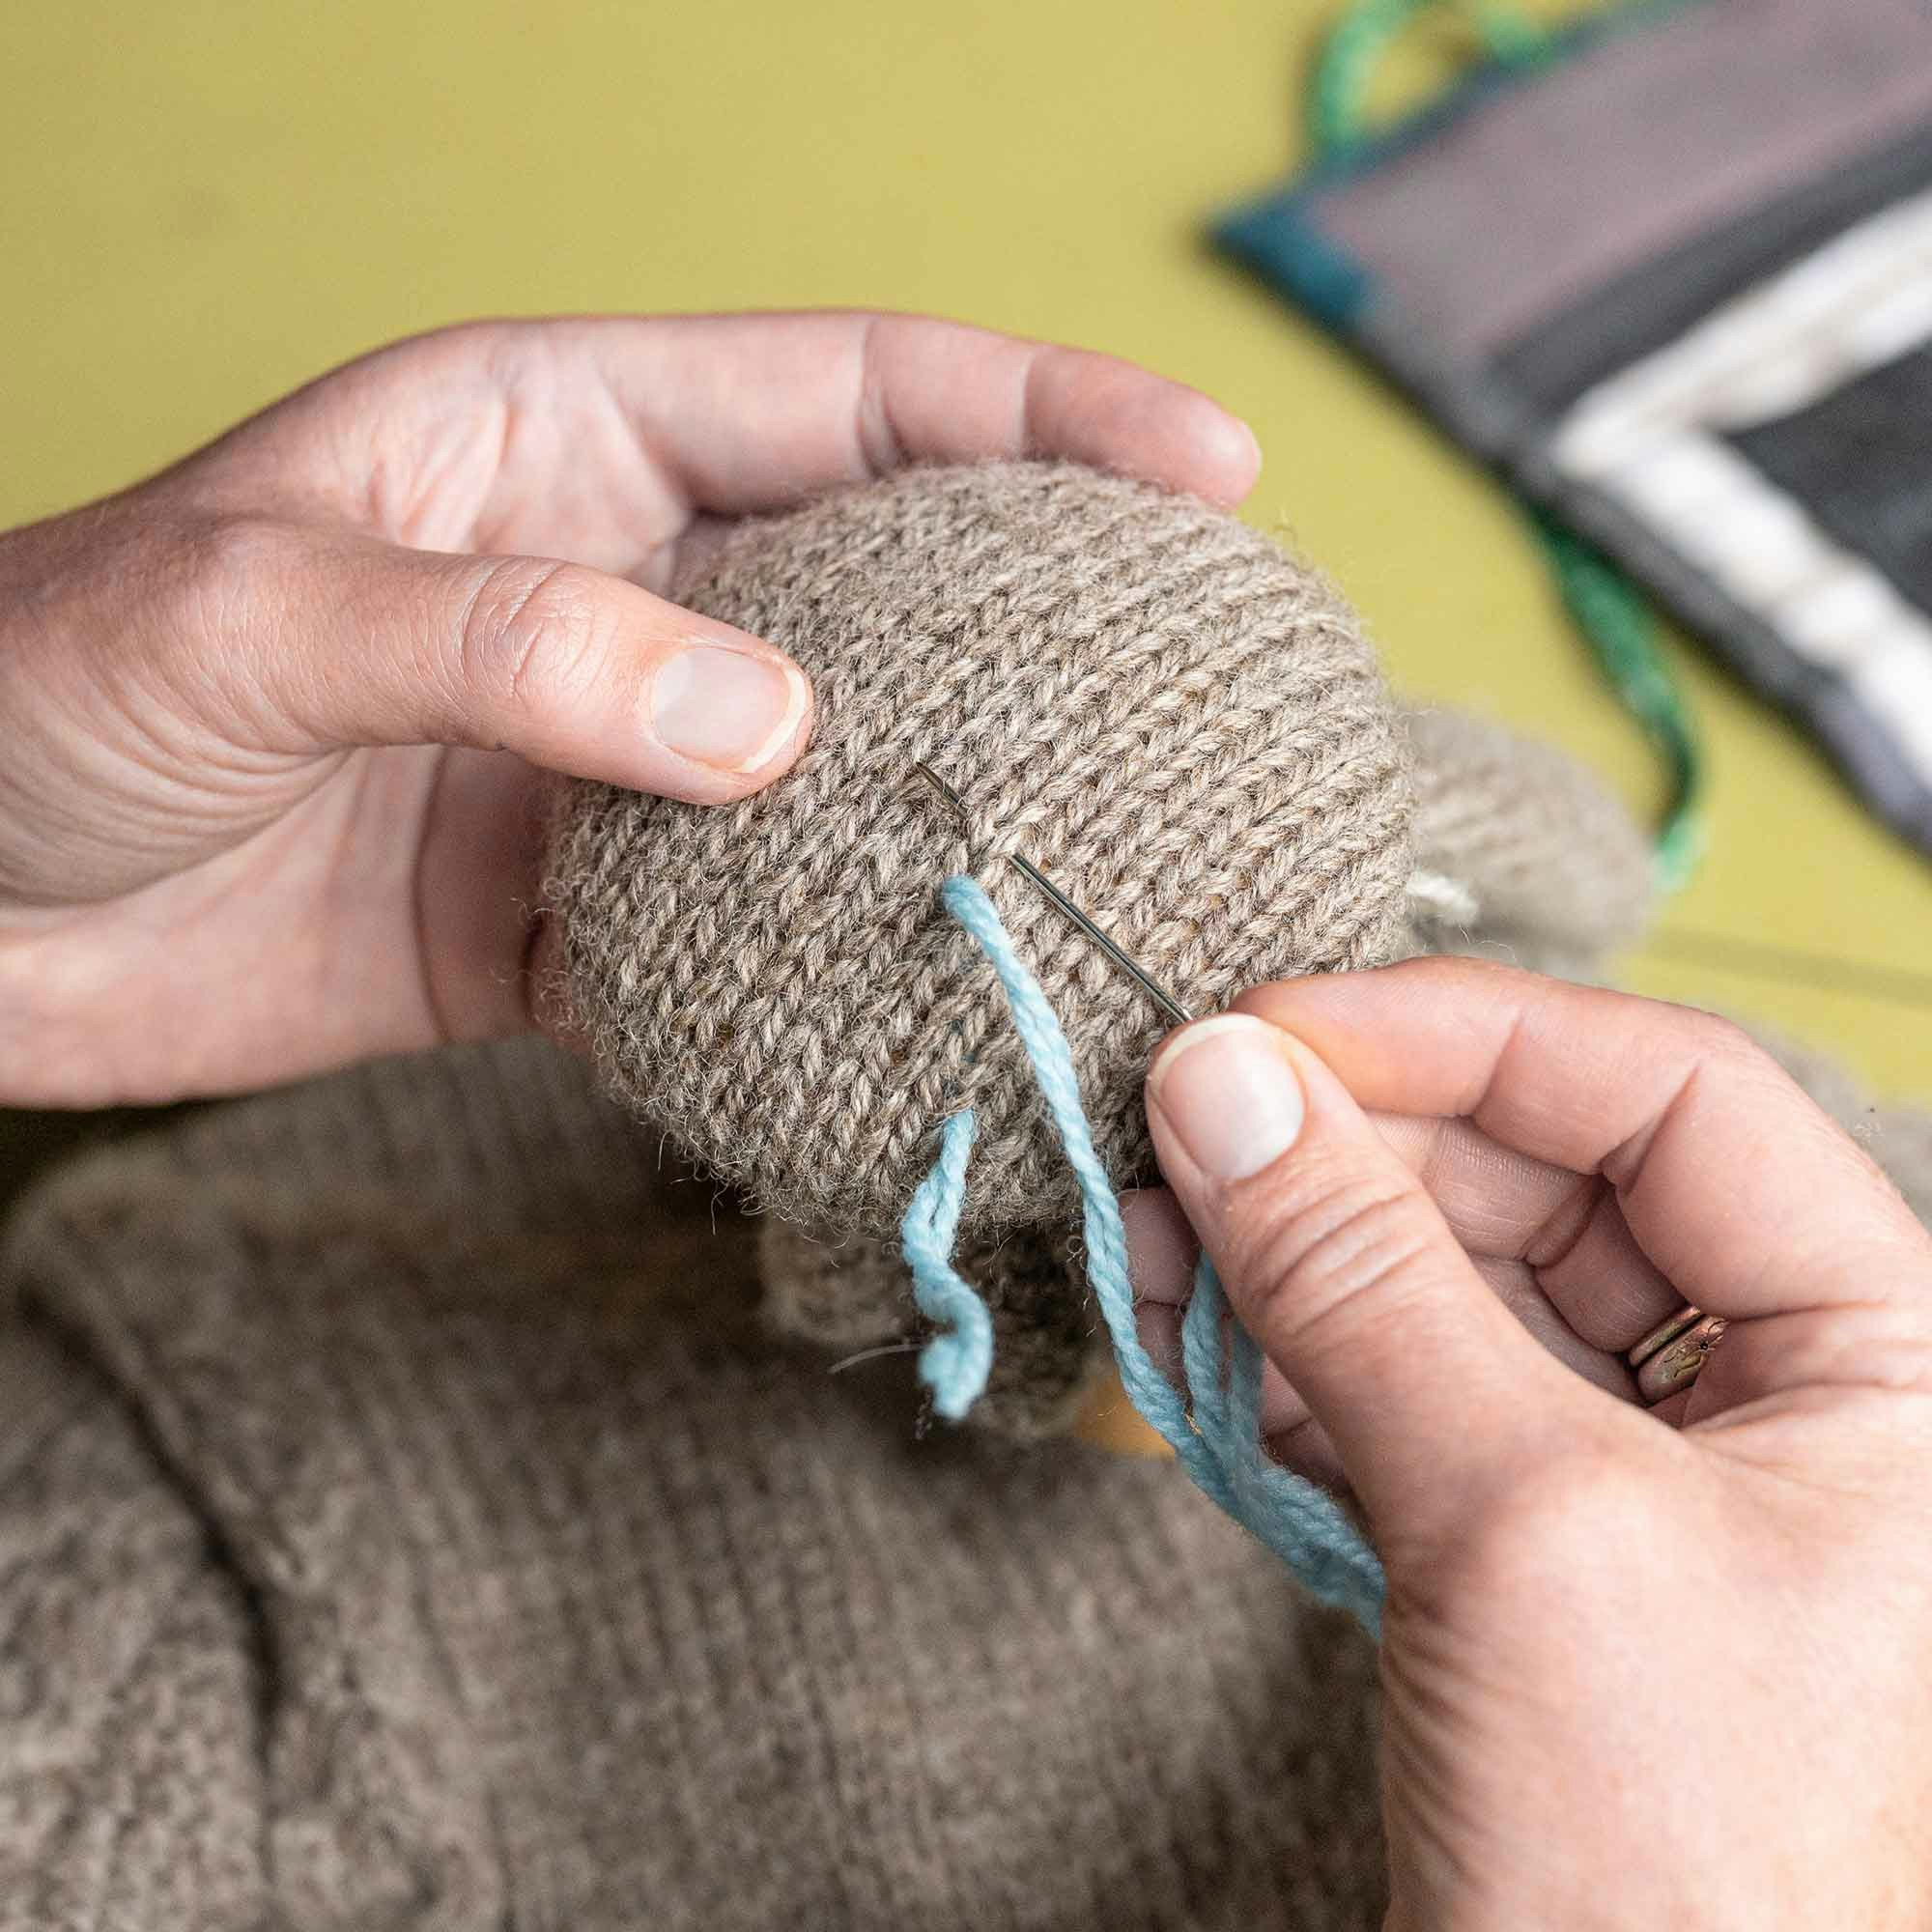
Step 2
Insert the needle behind both legs of the stitch above the one you wish to duplicate; pull the yarn through.
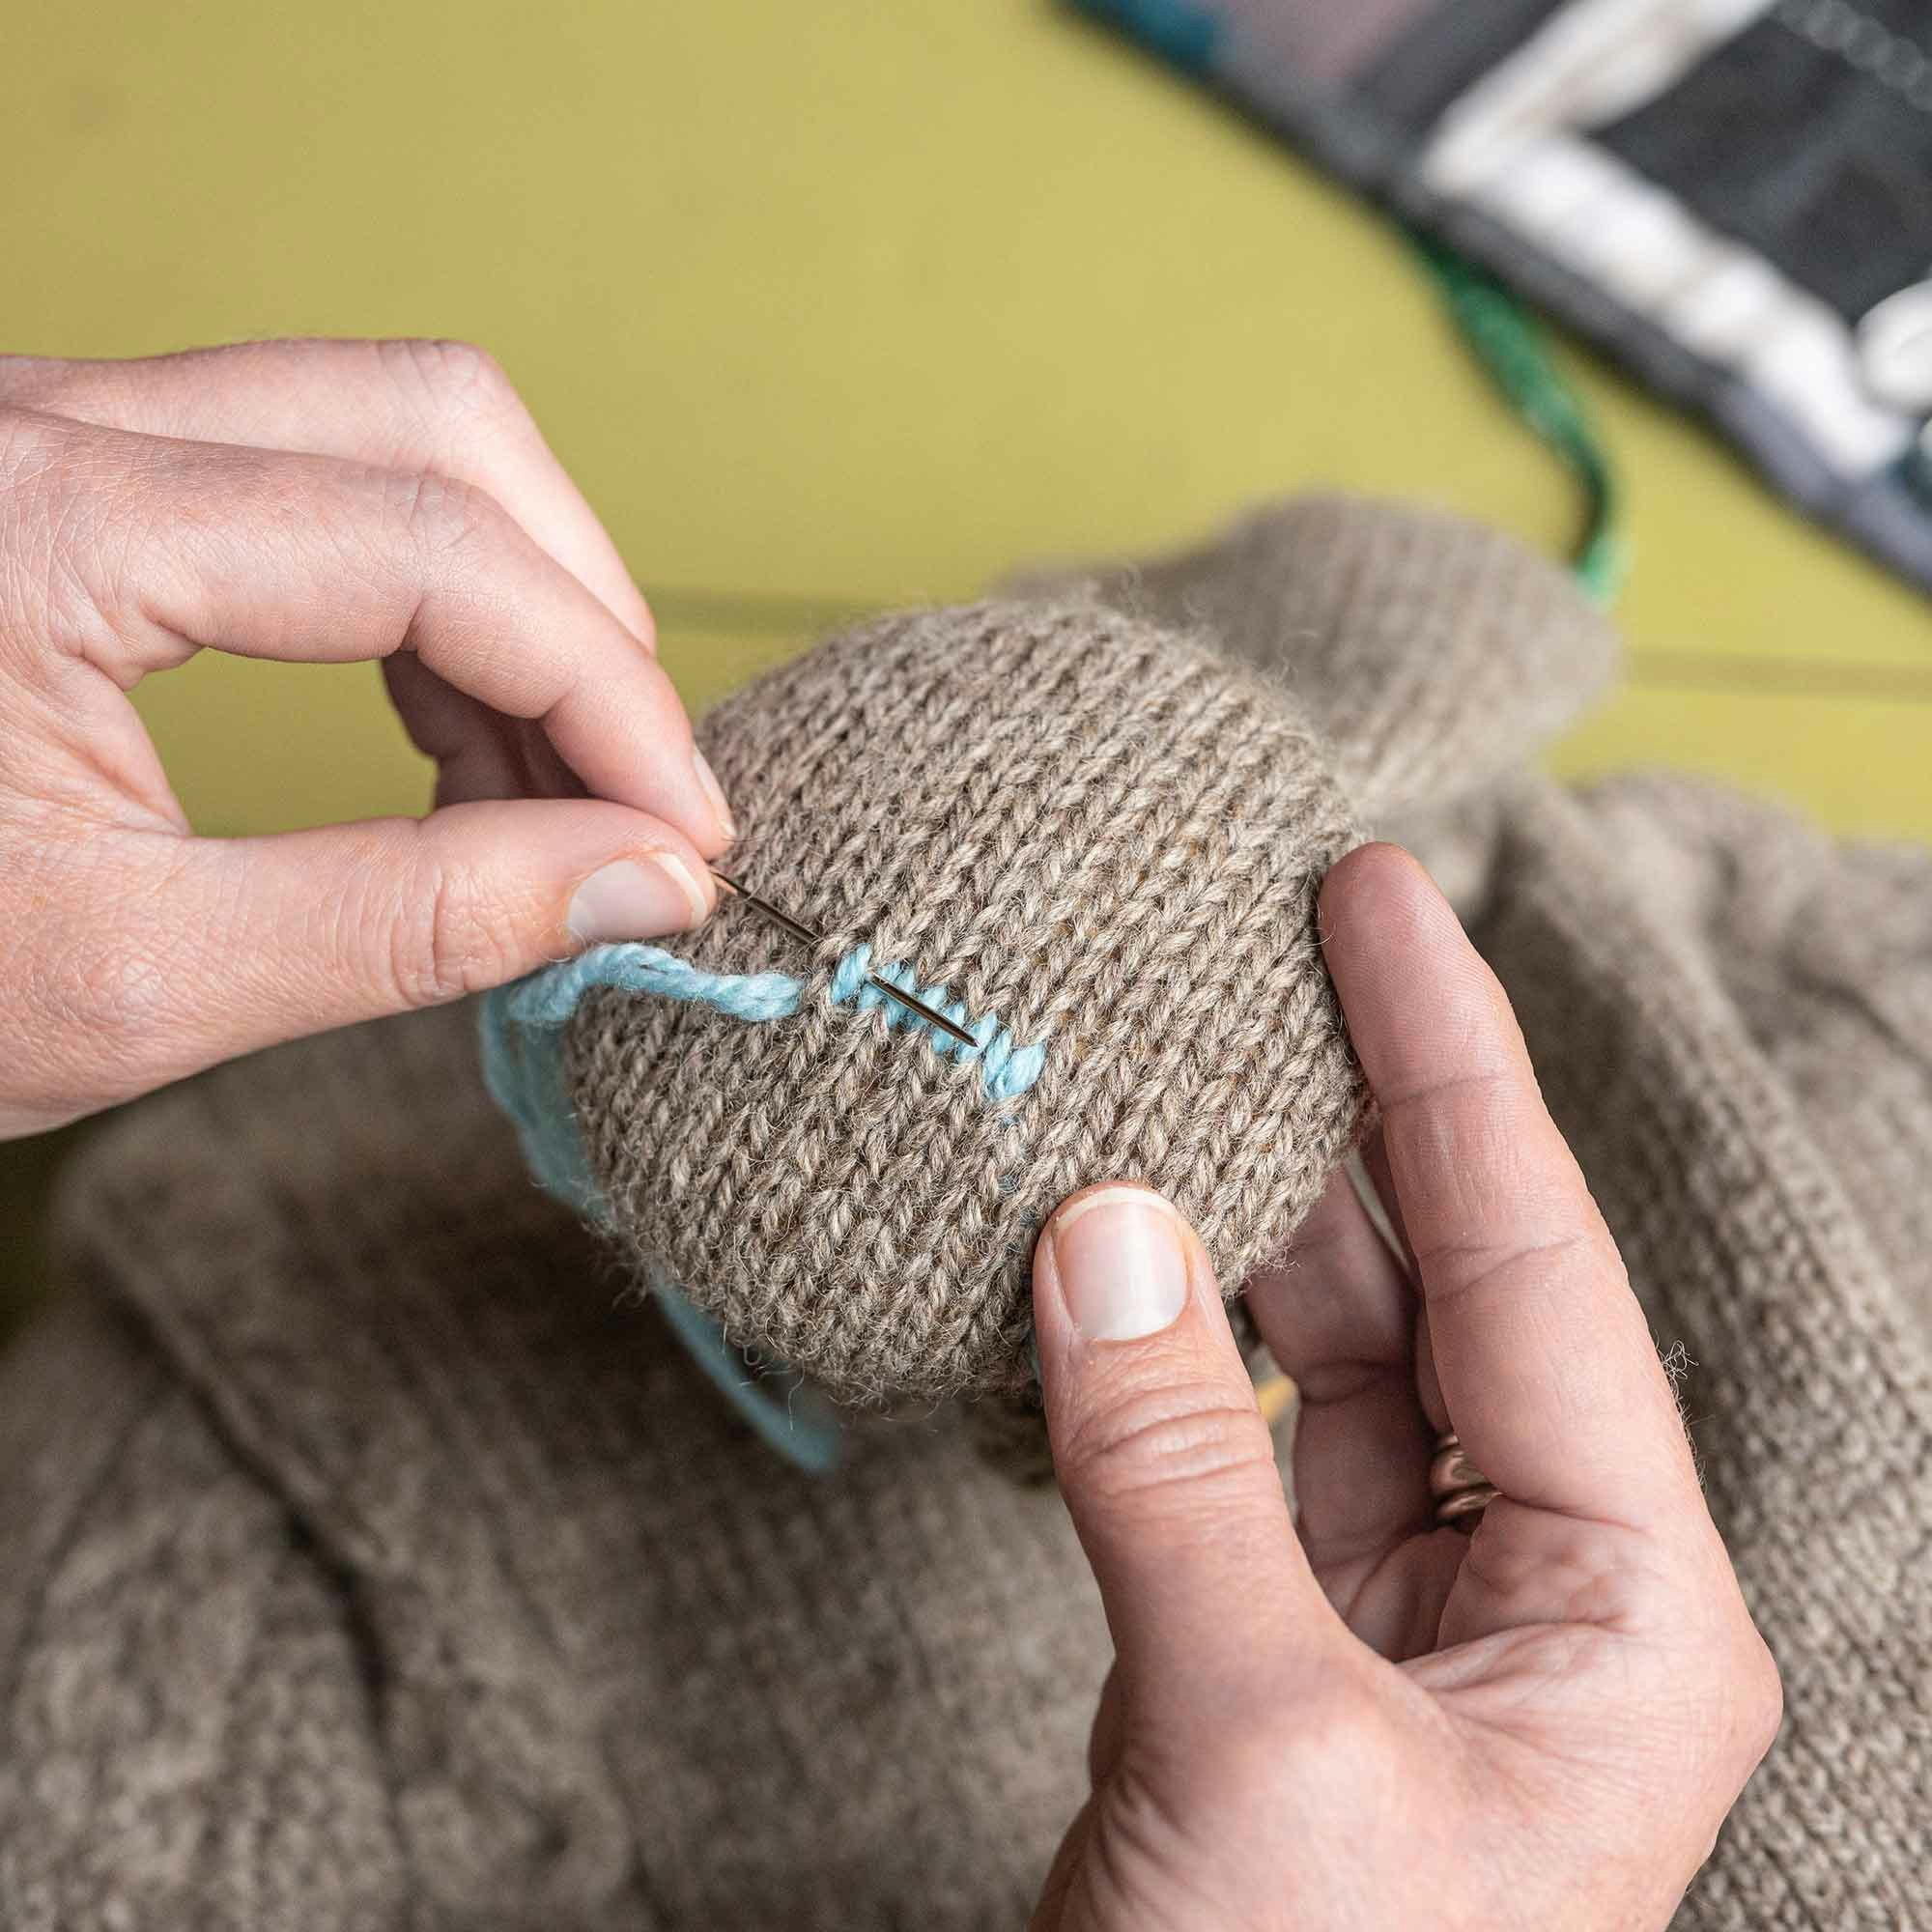
Step 3
Insert the needle at the base of the stitch you are duplicating, then pass it behind one leg of the stitch below and one leg of the adjacent stitch below; pull the yarn through.
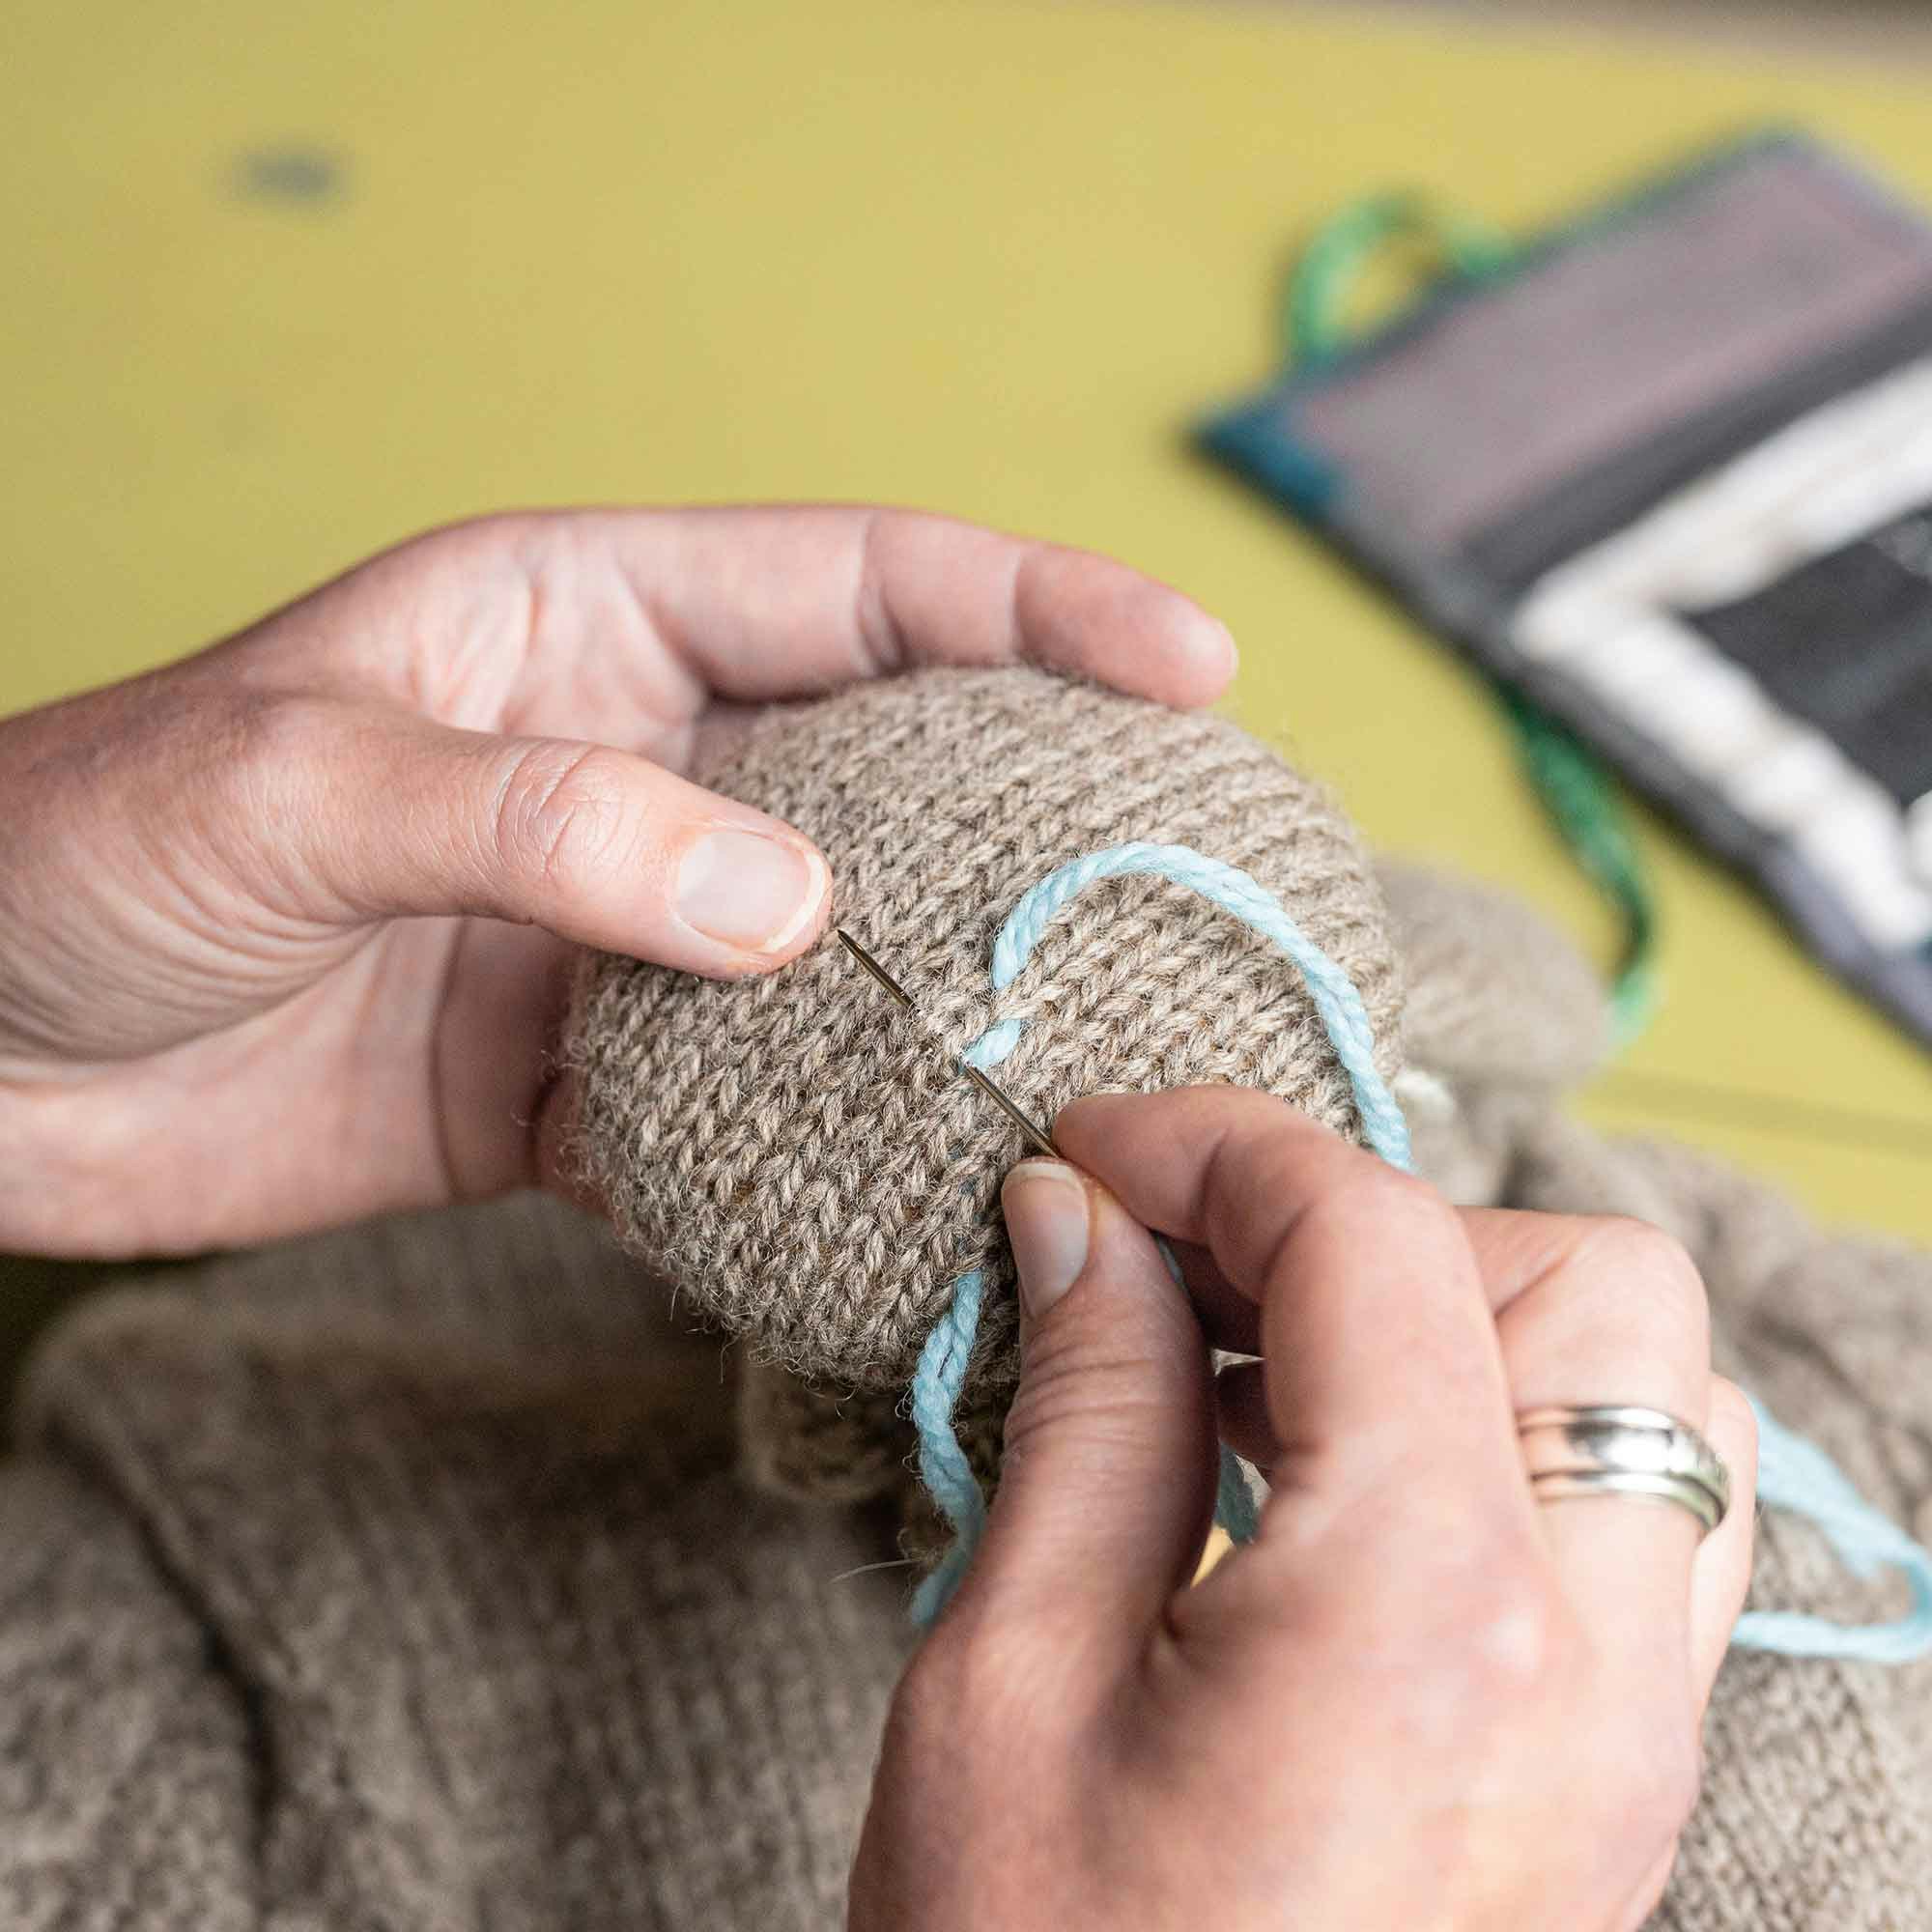
Step 4
Repeat Steps 2 and 3 until you have duplicated the final stitch. The working yarn will be one stitch beyond the end of your duplicated stitches, adding stability to the mend.
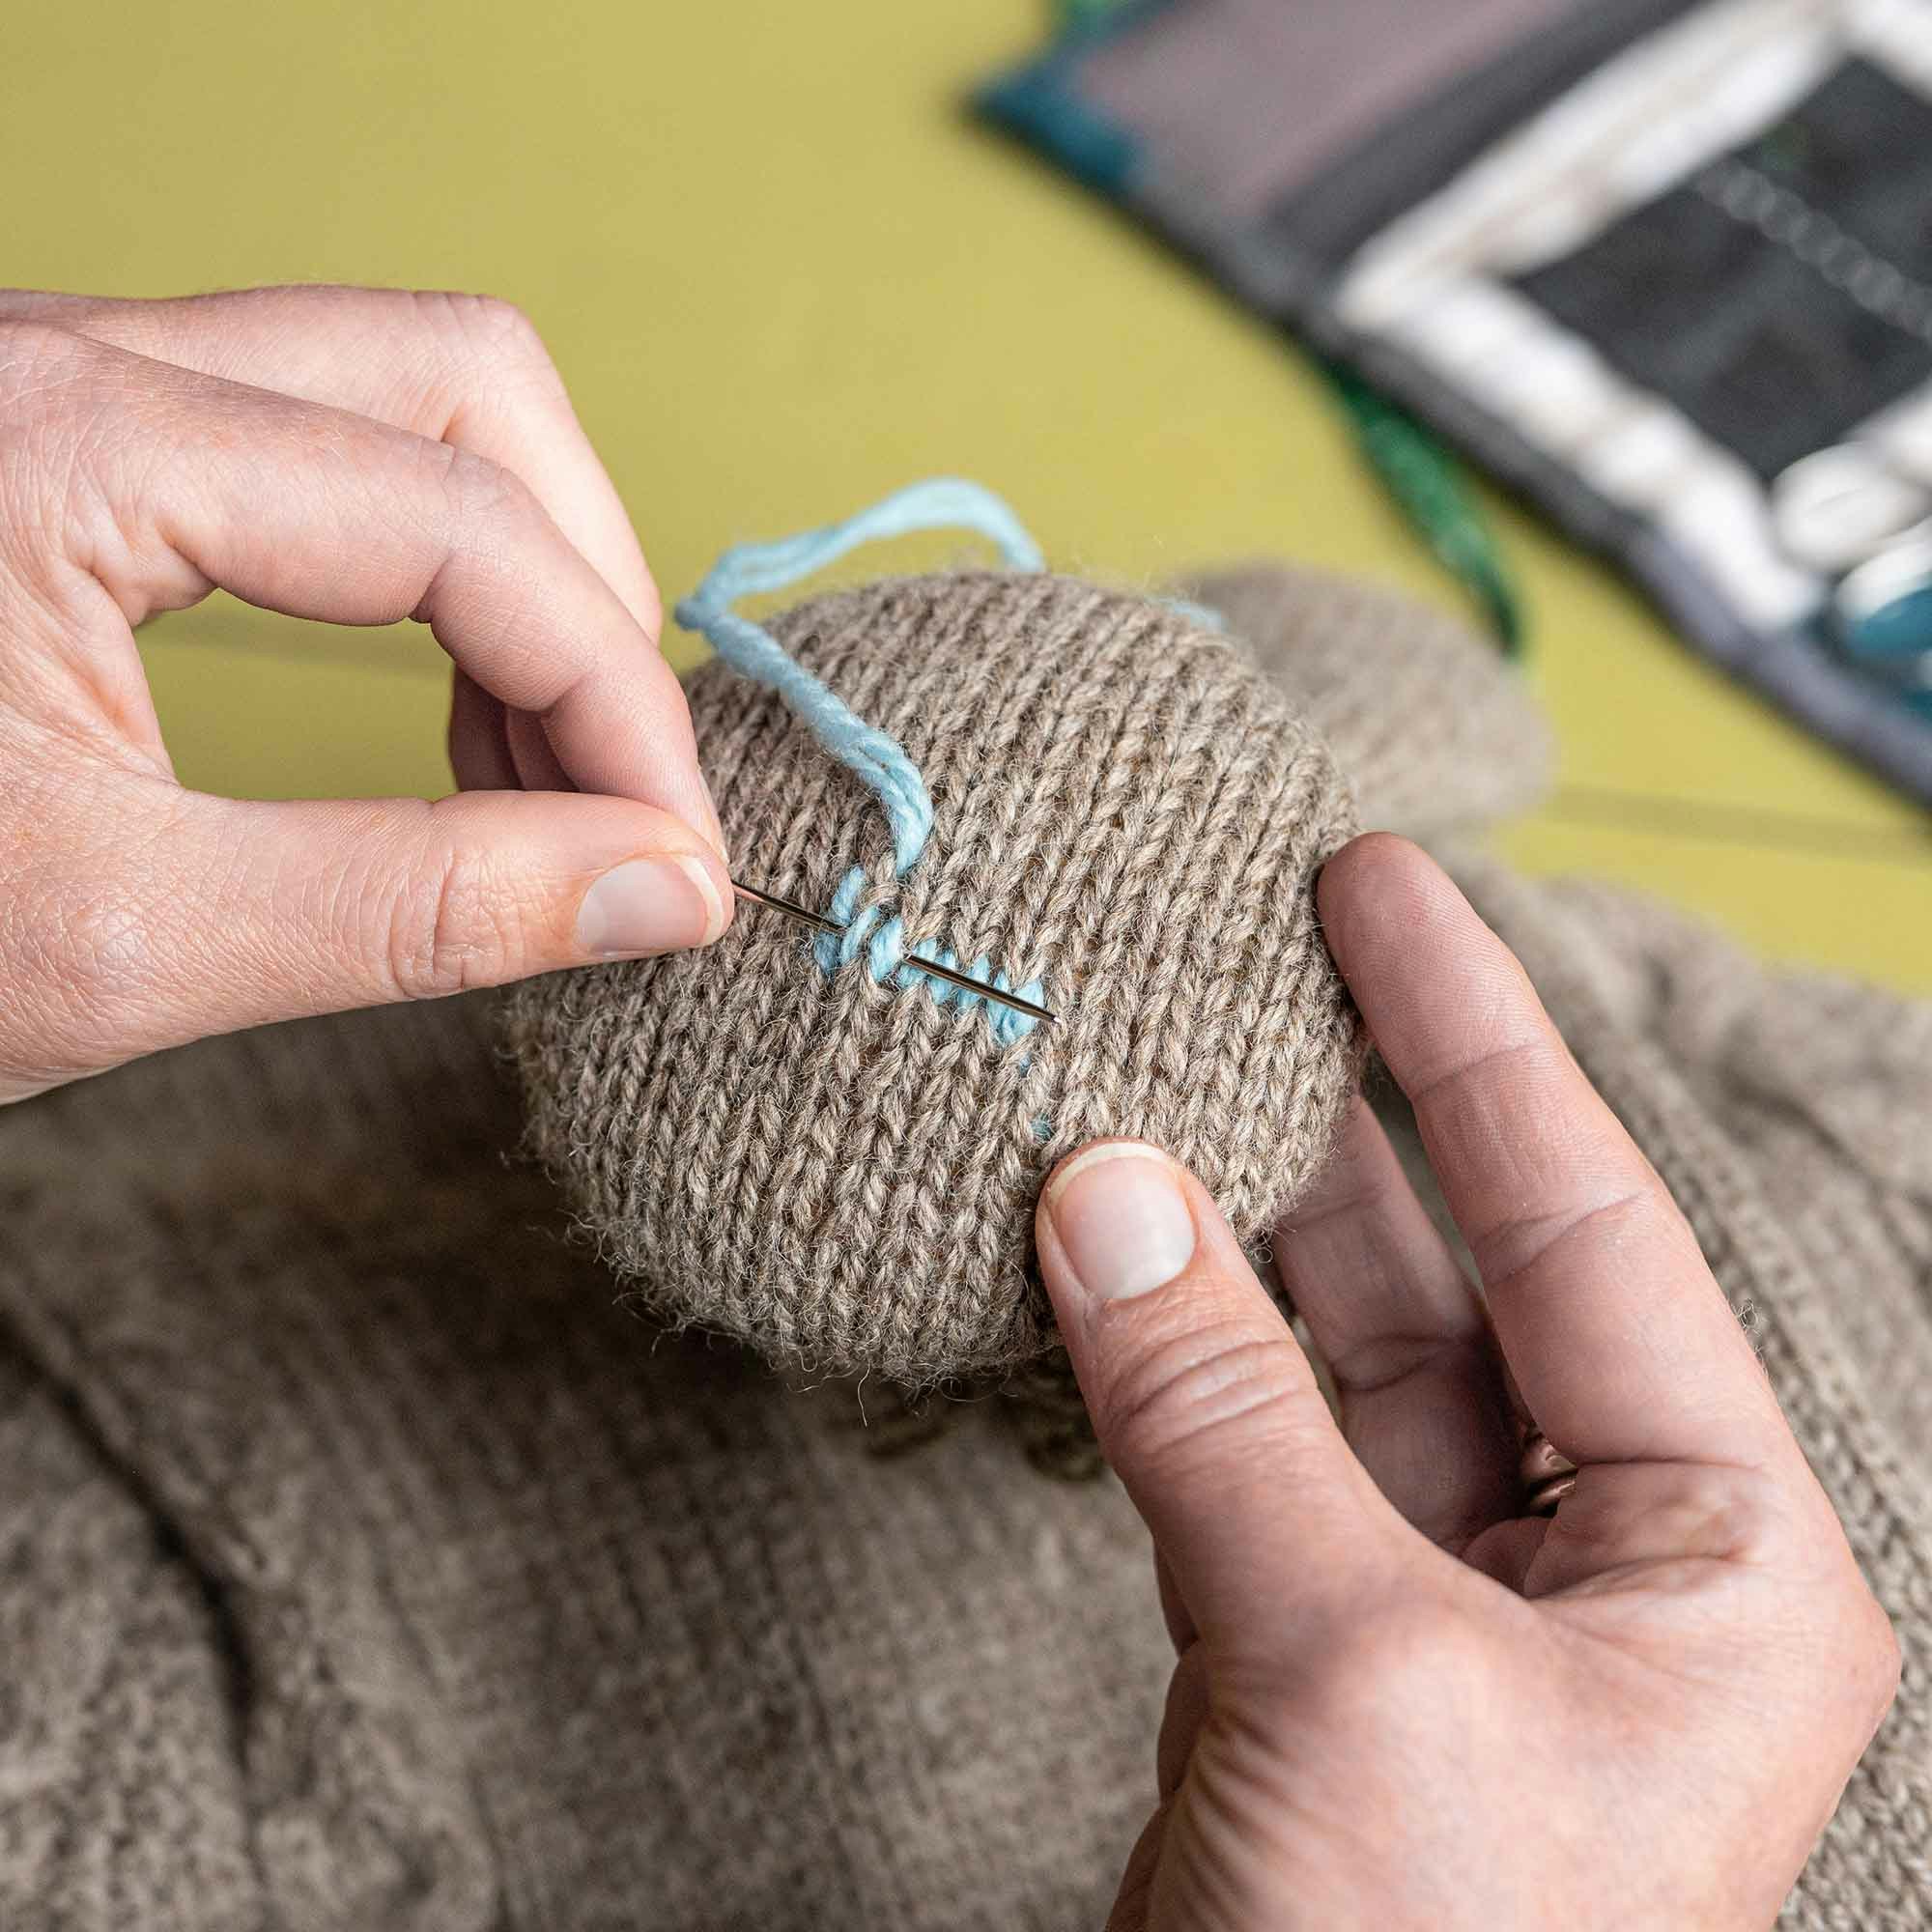
Step 5
Now insert the needle from left to right, catching the bar on the WS of the fabric beside the mend. Bring the needle tip to the RS in the center of the stitch below the one you wish to duplicate; pull the yarn through and give a gentle tug to hide the turning loop.
Step 6
Insert the needle from left to right behind the two legs of the stitch above the one you will be duplicating; pull the yarn through. Then, insert the needle below the stitch as you did before.
Continue creating duplicated stitches in this way, working back and forth in rows, until you have completed your mend. Turn to the wrong side to weave in the yarn tails, further stabilizing the mended area.
More Tips from Kate
Keep the mending yarn snug to the base fabric but take care not to pull too tightly and pucker the fabric.
Untidy mend? Pull and stretch the base fabric a bit to settle the new stitches before deciding if you need to redo any sections.
Steaming the work will open the yarns and help them settle into place.
If you are ambidextrous and can easily work back and forth, go for it! If not, don’t hesitate to try turning the work upside down to continue working from right to left (or left to right).
Resources
Brown Sheep Company Waverly Wool Needlepoint Yarn
Clover Darning Needles
Garthenor Organic Snowdonia Sock