Subscriber Exclusive
4 Ways to Make Your Cable Knits Pop
Looking for high-drama cables? This guide will help you trouble-shoot wonky cables, choose yarns, and find the fabric you love.
Looking for high-drama cables? This guide will help you trouble-shoot wonky cables, choose yarns, and find the fabric you love. <a href="https://farmfiberknits.com/4-ways-to-make-your-cables-pop/">Continue reading.</a>
https://farmfiberknits.com/cdn-cgi/image/format=auto/https://www.datocms-assets.com/101500/1756422139-larson-cable-pop-header.jpg?auto=format&w=900
To celebrate the release of the Vintage Maple Cardigan—with its stunning, high-relief cables—we wanted to gather some great tips for fine-tuning your cable knits. Some patterns are designed with strong, unapologetic cables, while others need softer, more malleable cables that shape to the body. Here, we have 4 tips for getting that strong POP.
1. Great Cables Start with the Fiber
As a fiber-focused knitter, I always look to the fiber first, but it is especially true when it comes to cable knits. The tugging and tension we place on the yarn as we reorder the stitches to create cable motifs can be dramatically influenced by the elasticity of the fiber itself. Crimpy wools such as Targhee or Corriedale can stretch and then recover their natural shape.
This natural elasticity can also allow cable knitting to be easier on our hands. If you struggle with hand fatigue, tend to be a tight knitter, or are just new to cable knits (welcome!), choosing bouncy fibers can help.
We can get a good sense of the elasticity of our yarn with a simple test and a few inches of yarn. For a quick example, I am holding two sample yarns against a cutting mat (anything with a ruler will work) with one end firmly held at the 0 mark and the other end firmly pressed at the 4-inch mark.
 Ready, set, stretch.
SUBSCRIBER EXCLUSIVE
To celebrate the release of the Vintage Maple Cardigan—with its stunning, high-relief cables—we wanted to gather some great tips for fine-tuning your cable knits. Some patterns are designed with strong, unapologetic cables, while others need softer, more malleable cables that shape to the body. Here, we have 4 tips for getting that strong POP.
1. Great Cables Start with the Fiber
As a fiber-focused knitter, I always look to the fiber first, but it is especially true when it comes to cable knits. The tugging and tension we place on the yarn as we reorder the stitches to create cable motifs can be dramatically influenced by the elasticity of the fiber itself. Crimpy wools such as Targhee or Corriedale can stretch and then recover their natural shape.
This natural elasticity can also allow cable knitting to be easier on our hands. If you struggle with hand fatigue, tend to be a tight knitter, or are just new to cable knits (welcome!), choosing bouncy fibers can help.
We can get a good sense of the elasticity of our yarn with a simple test and a few inches of yarn. For a quick example, I am holding two sample yarns against a cutting mat (anything with a ruler will work) with one end firmly held at the 0 mark and the other end firmly pressed at the 4-inch mark.
 Ready, set, stretch.
[PAYWALL]I’m going to see how far I can slide away from the 4-inch mark of my first sample to stretch the yarn out. The purple yarn I am testing first is a two-ply Aran-weight yarn that is 100% Romney wool. I am able to stretch 4 inches to about 4½ inches.
 The Romney yarn stretches about a half inch.
Next up is the green yarn, which is a blend of breeds that includes Targhee, Corriedale, and a bit of Romney. When I stretch 4 inches of this yarn, it extends to 5½ inches!
 The crimpy wool blend stretches 1½ inches—three times as far as the Romney.
Romney is a strong, silky wool with far less elasticity. It would make a firm, drapey fabric—also lovely! The crimpy blend would add bounce and spring to your cabled stitches, keeping motifs sharp and garments from stretching out of shape.
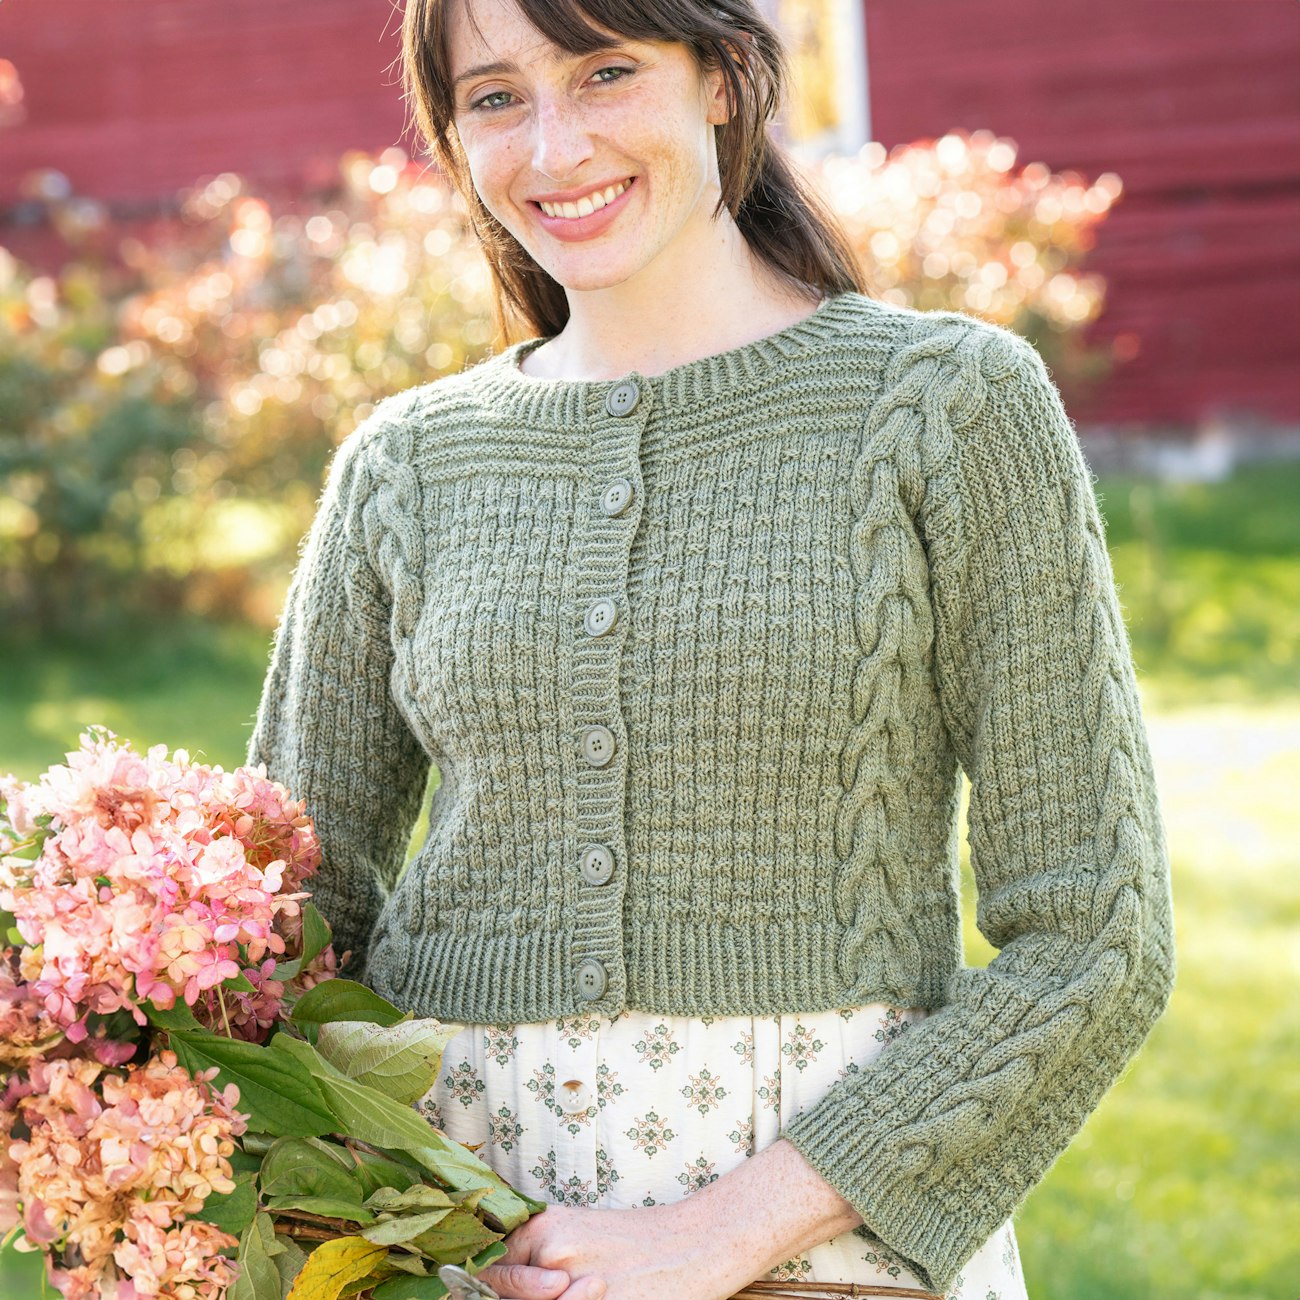
 The Vintage Maple Cardigan by Lisa Lloyd, knitted in Green Mountain Spinnery Weekend Wool. Photo by Gale Zucker
2. As Usual, Gauge Matters
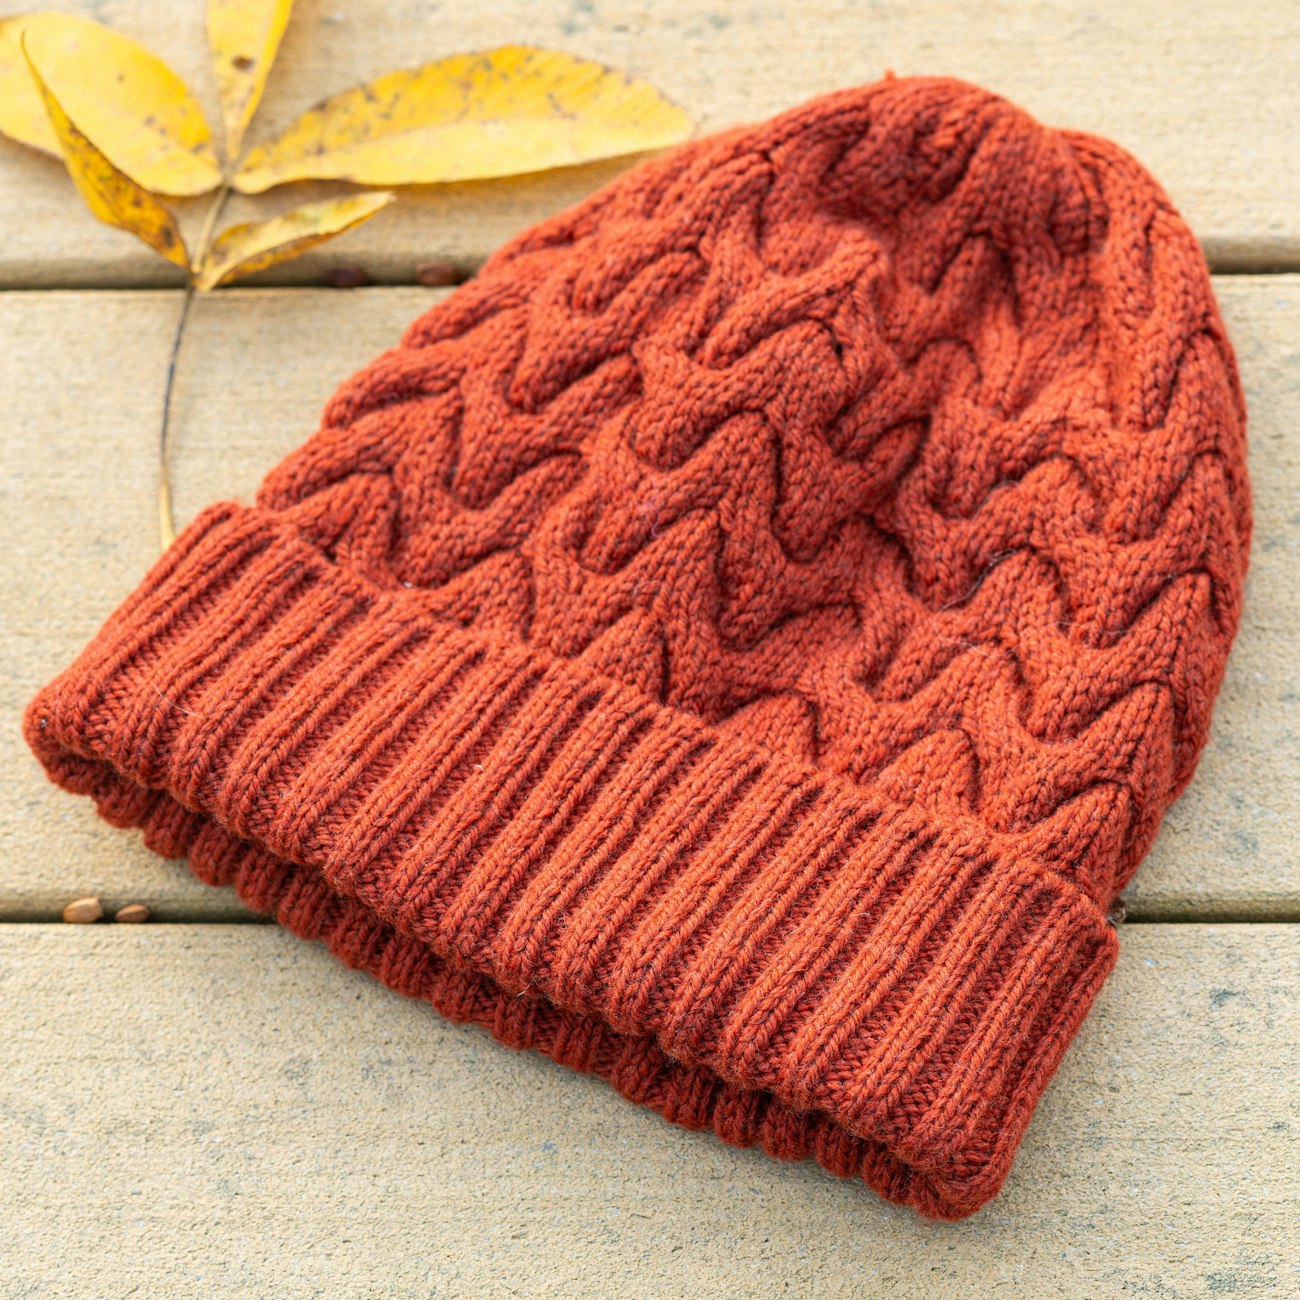
When looking for strong cable motifs you can spot from afar, denser gauges are often needed. Tayler Harris’s Traverse Toque is a great example. The yarn, gauge, and motifs combine to create a structured look. A looser gauge—either from choosing a finer yarn or larger needle—would give this hat a softer effect and a very different shape.
 The Traverse Toque by Tayler Harris. Photo by Gale Zucker
3. Rethink Your Cable Needle
As we work a knitted cable, stitches are reordered. We can reorder by slipping stitches onto a cable needle for safekeeping or working without a cable needle by dropping stitches and picking them back up in a new configuration. I find that how we move our stitches back and forth is the most likely places for our cable motifs to get wonky, stretched out, and obscured.
Cable needles tend to be a smaller gauge than our knitting needles. There are many styles and designs, and they work well for many knitters. However, the smaller gauge can allow the tension of these stitches and their neighbors to be redistributed.
For example, if you are working a 3/3 RC, you will slip three stitches onto a cable needle in the back, knit the next three stitches, and then work the cable-needle stitches. When you insert your needle into the first knit stitch (see below), it can pull yarn from its neighbor seated on the cable needle, creating a loose stitch in the front of the cable.
 Cable needles are a smaller gauge than the knitting needles we are using for a project. This can allow the stitch sizes to change, which can result in flattened or wonky cables.
However, I’ve got two easy options to avoid this issue!
Use a Double-Pointed Needle (DPN)
Simply use a DPN of the same size or slightly smaller as a cable needle. The DPN will help to keep all the stitches the same tension. You might also be able to use an interchangeable needle tip.
Cabling Without a Cable Needle
Or you can go needle free! When cabling without a cable needle, stitches are dropped and picked back up in a new order. While it seems like this would lead to the loose/tight issue, I don’t find that to be true in practice. Because all the stitches are placed back on the left needle before knitting, they are all tensioned similarly. I love this technique and created a video tutorial, which you can find here.
When it comes to bigger cables that happen less frequently, like the 8-stitch cables in Norah Gaughan’s Wee Cardi, these techniques can make a big difference for some knitters!
 The Wee Cardi by Norah Gaughan. Photo by Gale Zucker
4. Choose Patterns that Pop
Some patterns create stronger cable effects. Closely placed cables that repeat more often—such as the Traverse Toque above—and patterns that cable quite a few stitches at once—such as the Wee Cardi—create a lot of cable drama! Traveling cables are also great for giving you a lot of bang for your cable buck. Deborah Newton’s Chill Chaser Poncho is shown in a variegated solid yarn that would have obscured a smaller cable motif. However, the traveling cables (those that move on the diagonal) create strong repeating V shapes that our eye can easily pick out against the background.
 The Chill Chaser Poncho by Deborah Newton. Photo by Gale Zucker
I hope these tips will help you fine-tune your next cable knit!
—Kate
Find more than 20 cable-knitting patterns for hats, socks, sweaters, and mitts in the Farm & Fiber Knits Library!
 Ready, set, stretch.

 The Romney yarn stretches about a half inch.
  The crimpy wool blend stretches 1½ inches—three times as far as the Romney.
  The Vintage Maple Cardigan by Lisa Lloyd, knitted in Green Mountain Spinnery Weekend Wool. Photo by Gale Zucker
  The Traverse Toque by Tayler Harris. Photo by Gale Zucker
  Cable needles are a smaller gauge than the knitting needles we are using for a project. This can allow the stitch sizes to change, which can result in flattened or wonky cables.
  The Wee Cardi by Norah Gaughan. Photo by Gale Zucker
  The Chill Chaser Poncho by Deborah Newton. Photo by Gale Zucker